
Making top-quality coffee doesn't have to be difficult. Here are the tips to easily upgrade the coffee you make every day.


Step 1 - Cleaning
A good cup of coffee starts with clean equipment.
The first step to getting the best possible taste from your coffee is to clean all equipment that comes into contact with the coffee, before, during and after brewing. Coffee residue from the previous brewing process will impart its own flavor to the coffee, which any coffee drinker will quickly notice.
Cleaning routine:
Before each brew, wash the coffee flask and filter holder with soapy water and rinse thoroughly.
Use a coffee cleaner to clean the coffee maker every 14 days.
The cleaner can also be used in thermos jugs.

Path 2 - Freshly ground coffee beans
Experience the difference with freshly ground beans
.The next step for good and tasty coffee is to grind the coffee beans yourself. Coffee beans retain their aromas and flavors better than pre-ground coffee. Grind the beans just before brewing to preserve all the flavors.
Old and dry beans will lose much of their flavor and are a poor starting point for brewing. A rule of thumb is that it should be no more than five weeks since the beans were roasted and that they are packed in a tight and sturdy package.
Tip: Here are some useful tips for finding your personal favorite coffee
Step 3 - The coffee filter
Better coffee with a rinsed coffee filter
.As you know, coffee filters are made of paper, and the filter will give off an unfavorable paper taste when the coffee is brewed. You can prevent this by rinsing the filter before pouring in the freshly ground beans.
Always use white filters rather than brown ones, as these give off less flavor.

Step 4 - Clean and fresh water
A coffee cup consists of 98.5% water. That's why the quality of the water is important.
A coffee cup essentially consists of two ingredients: 98.5% water and the rest coffee. That's why the quality of the water has a major impact on the taste of the coffee.
The coffee flask is not suitable for filling the water container, as it may contain coffee residue that adds an unpleasant taste to the water.
We recommend having a funnel with a removable water container so that clean, fresh water can be filled directly into the container. Cold water is recommended as it often contains more oxygen and thus helps to extract the flavors in a better way.

Step 5 - The right amount and flat coffee bed
The important mixing ratio between water and coffee.
Decide how much coffee you want to brew before filling the funnel with water and coffee to get the right mixing ratio. Norwegian coffee information recommends using 60 grams of coffee beans to 1 liter of water.
Use a coffee scale to easily measure the correct amount of coffee beans to the amount of water. This gives a more precise result than using a coffee spoon.
Some coffee makers, such as our top models, have a water container with a deciliter gauge that also shows how many grams you need for the different amounts of water. This makes it very easy to ensure the right mixing ratio whether you're making one cup or one liter of coffee.
With the correct mixing ratios in place, it's important to give the filter holder a little shake to ensure a "flat coffee bed". This ensures that all the coffee comes into contact with the water and that no part of the coffee is wasted.
Tip: When you buy the Uniform coffee grinder, you'll also get the Uni precision coffee scale, which has an accompanying app that shows the right amount of coffee in relation to water.

Step 6 - Temperature and contact time
The right temperature and contact time work wonders.
Perfectly funneled coffee depends on having the right water temperature and contact time between water and coffee. The optimal temperature for the water is 92-96°C from the first drop and throughout the funnel process. Contact time means how long the water is in contact with the coffee powder before it drips into the flask. The recommended time is 4-6 minutes, depending on the type of coffee you use.
Use the coffee maker's adjustable drip stop to ensure the right contact time. With the right adjustment, you can ensure the same contact time for one cup of coffee as for a whole pot. Optionally, you can also adjust the grind level to customize the required contact time. A finer grind needs less contact time to extract the flavors and is ideal for brewing smaller amounts of coffee.
The temperature and contact time are requirements that The European Coffee Brewing Center (ECBC) has to approve coffee makers.
All Wilfa coffee makers are ECBC approved.

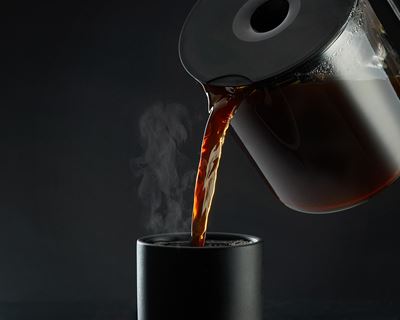
Step 7 - Storage
Make coffee several times rather than storing it for a long time.
A thermos is the best way to store your coffee. Coffee shouldn't be stored for much longer than half an hour, as it quickly loses its flavor and freshness. If you want to have coffee throughout the day, it's better to make a small amount of coffee several times during the day than large amounts in the morning.
TIP: Preheat the thermos jug with hot water to keep your coffee hot for longer. A cold pot will cool the coffee down.